
CloudLinux Manager in WHM lets you decide how much CPU, memory and disk speed each hosting package and each cPanel account may use. This guide walks you through changing the limits of a whole package, overriding them for a single account, and understanding the red warnings you may see afterwards.
Before you start
- A reseller plan that includes CloudLinux Manager: Reseller Advance, Business or Supreme, or any VIP Master Reseller plan. Reseller Starter uses fixed limits and has no CloudLinux Manager.
- Your WHM login. You can open WHM in one click from Services in your dashboard.
- The maximum limits for your plan. Check them in CloudLinux resource limits for resellers before you change anything.
Tip: Change limits on the package first. Every account on that package picks up the new values automatically, so you only override single accounts when one customer needs something different.
Open CloudLinux Manager
- Log in to WHM.
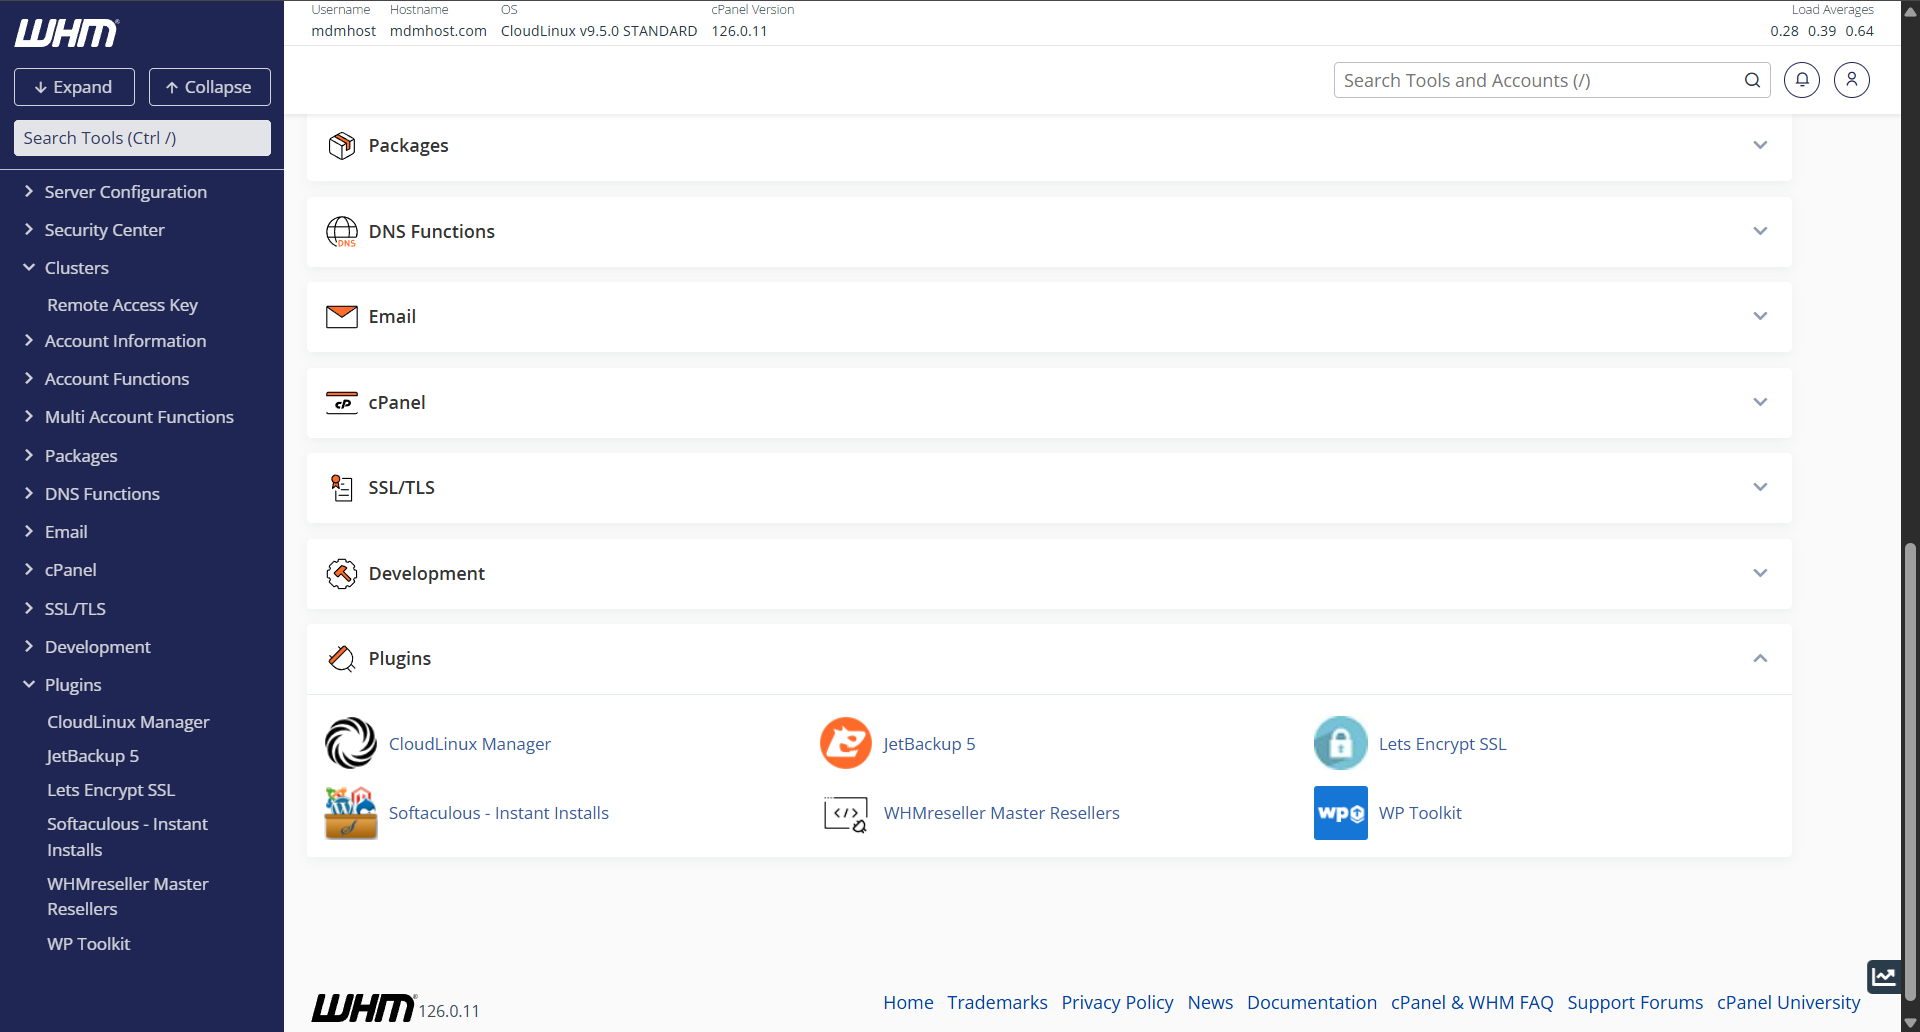
- In the left sidebar, scroll to Plugins and click CloudLinux Manager.
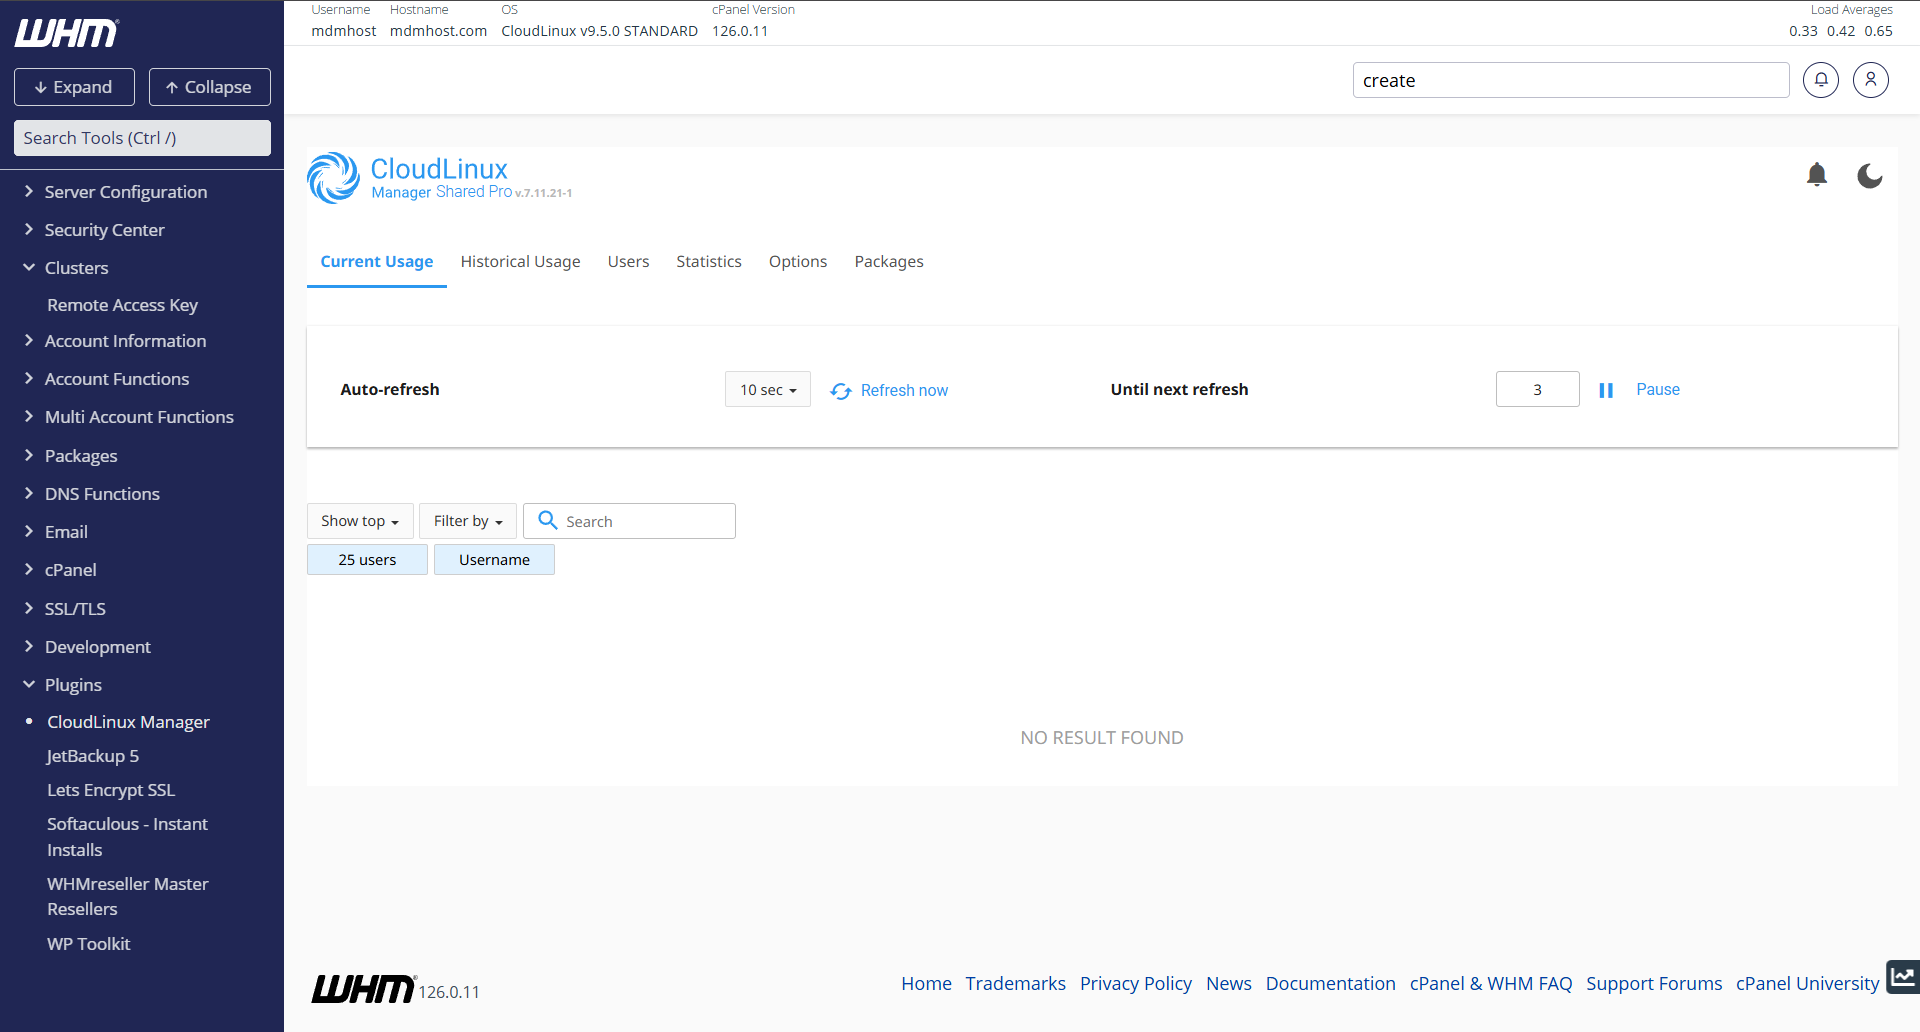
The dashboard opens with tabs such as Current Usage, Users, Statistics and Packages. Packages and Users are where you set limits.
Change the limits of a package
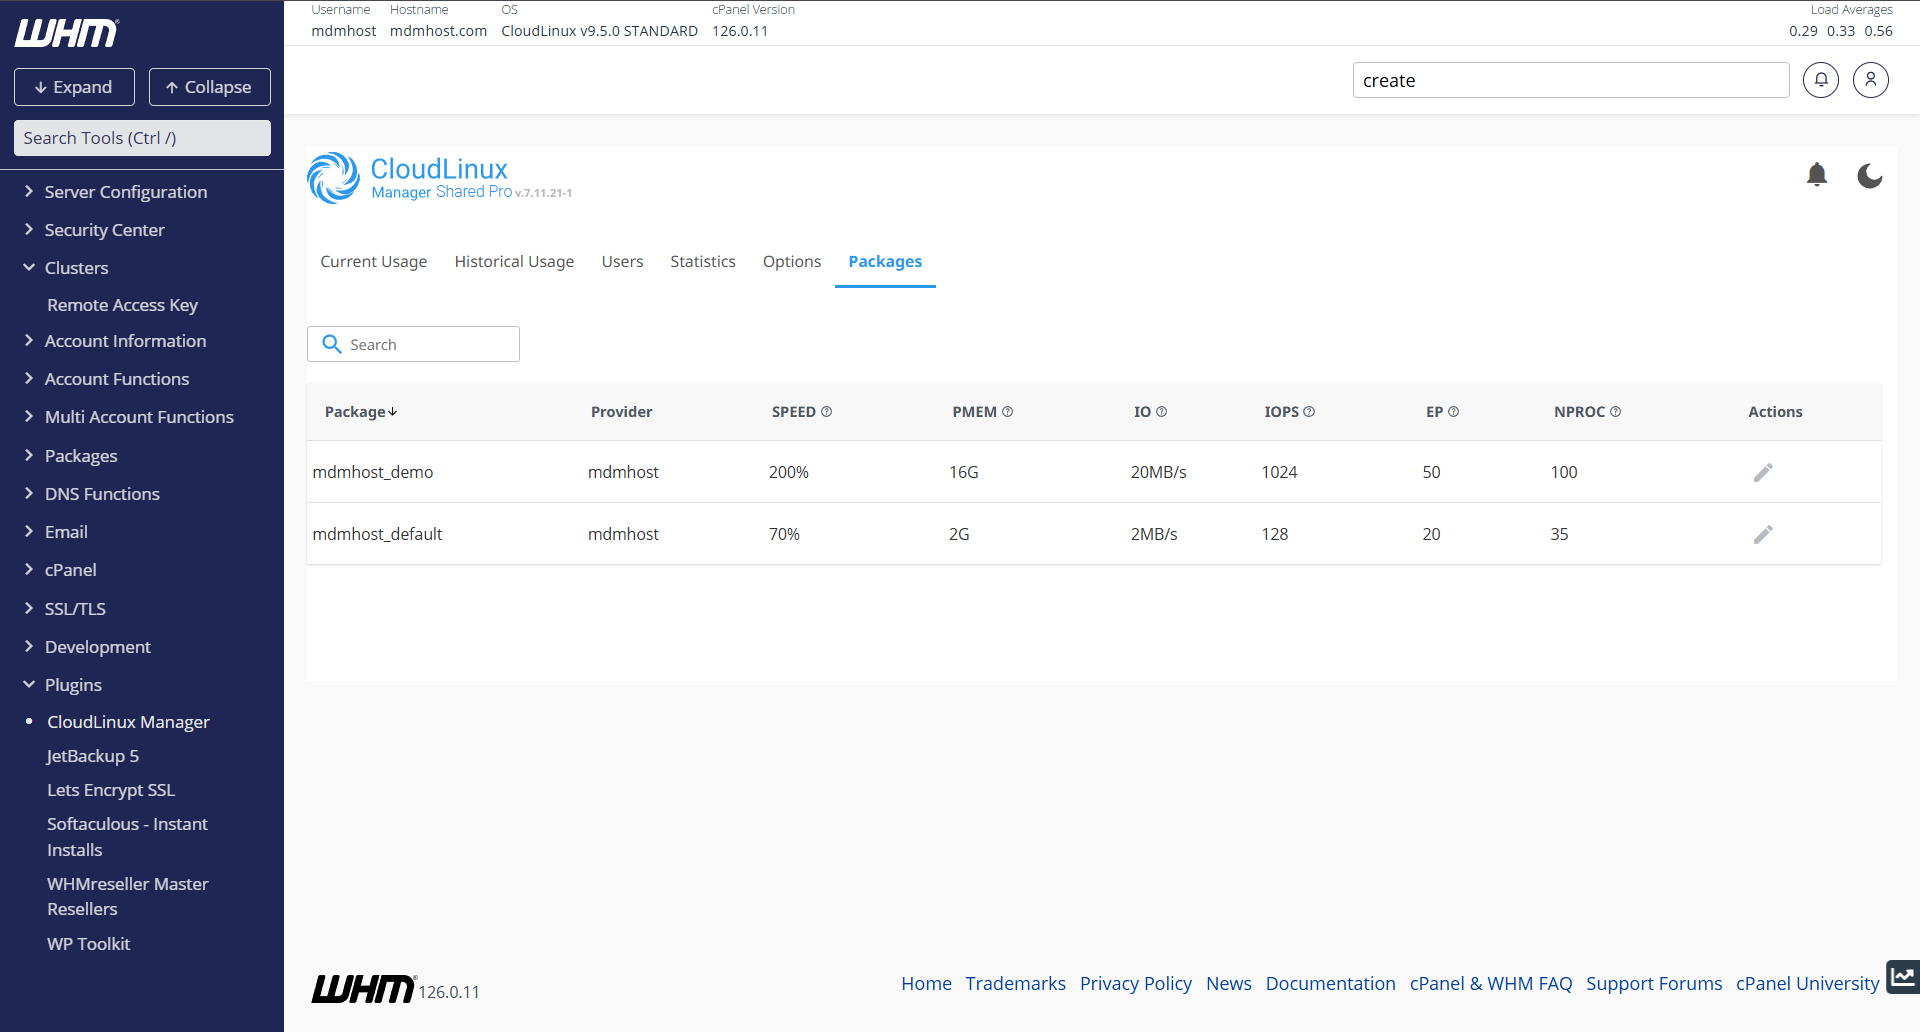
- Open the Packages tab.
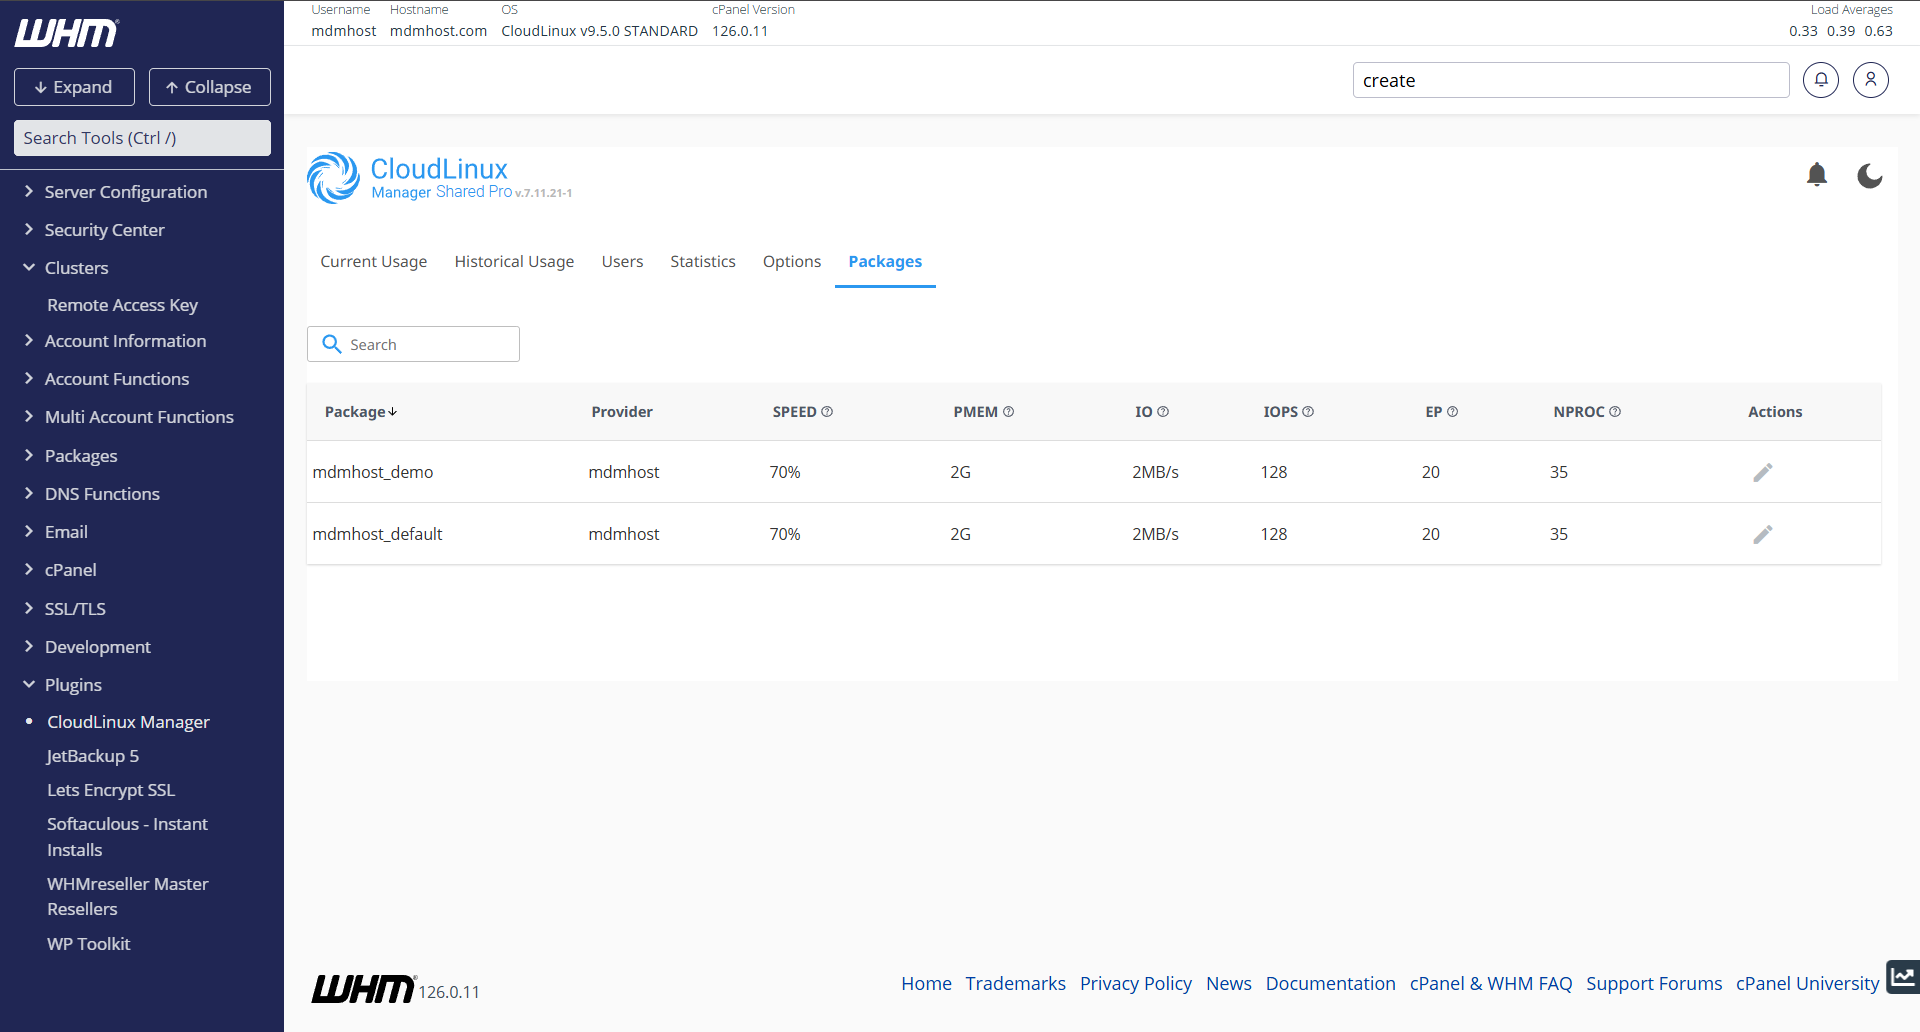
- Find the package and click the pencil icon in the Actions column.
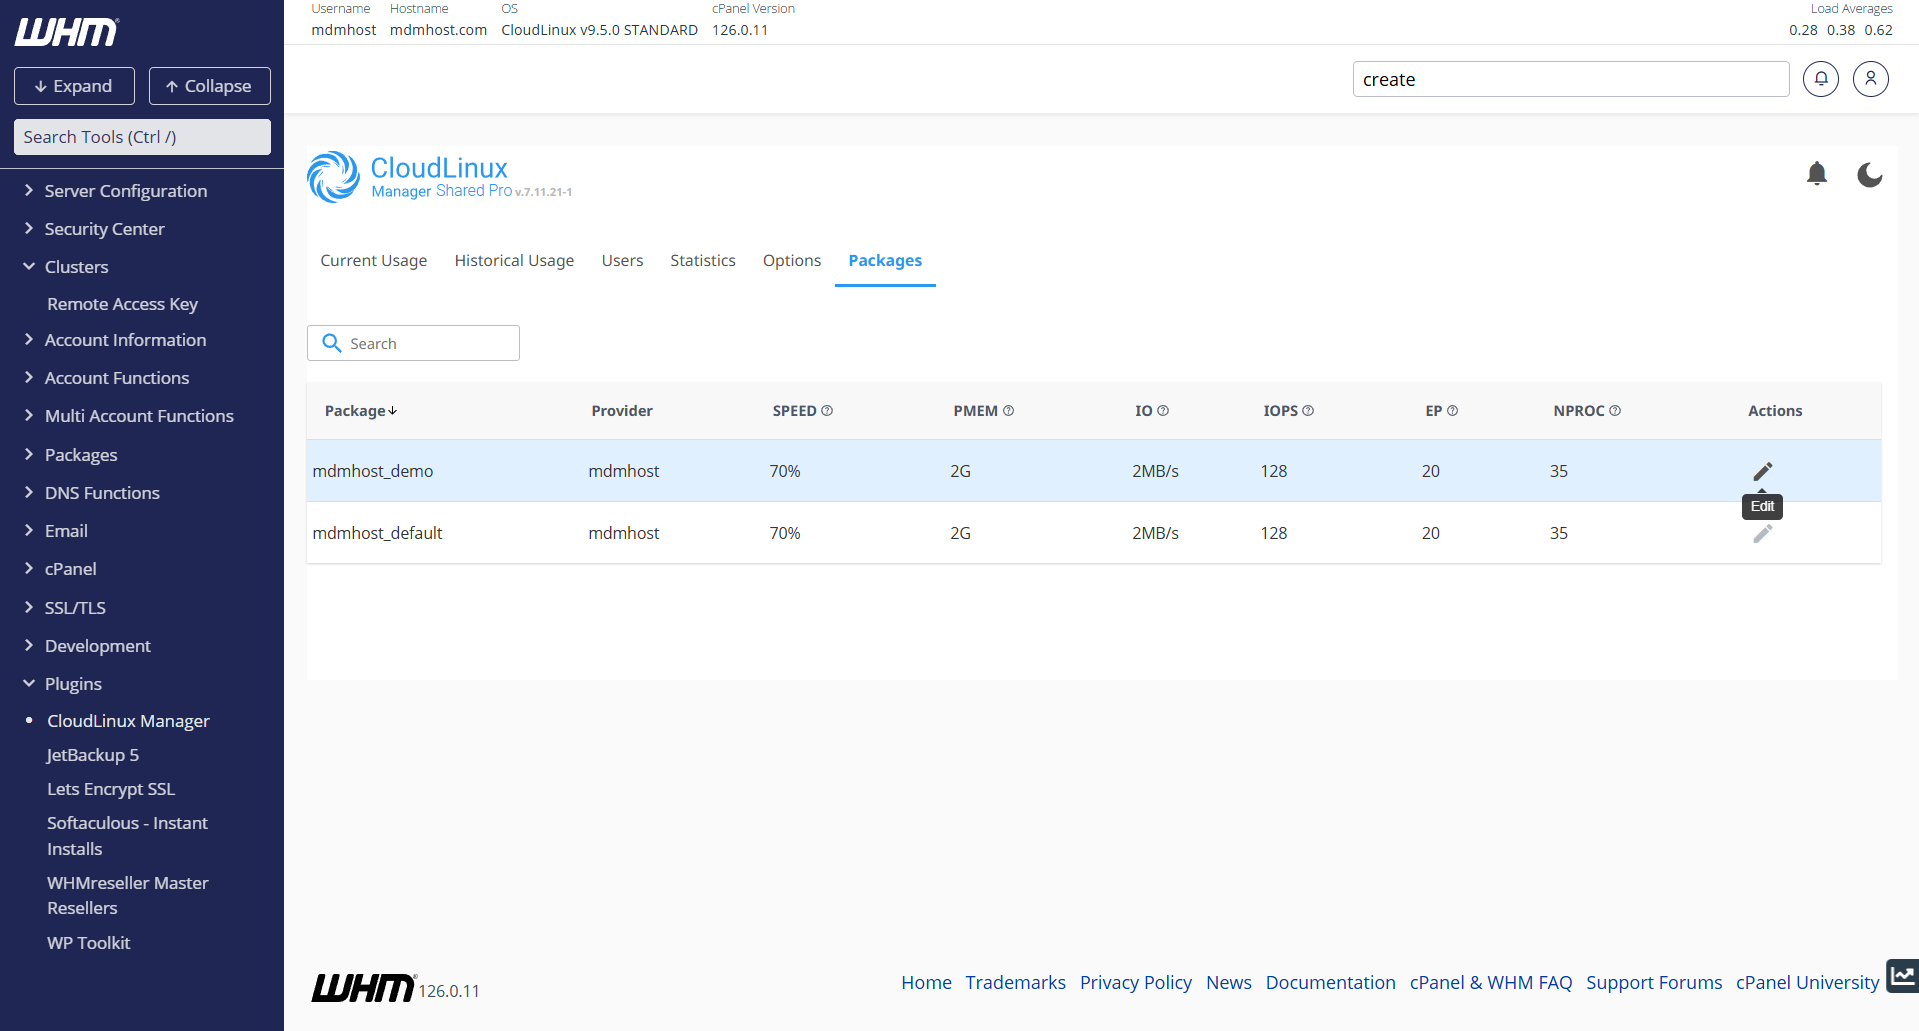
- Set the limits you want for CPU, physical memory (PMEM), I/O, IOPS, entry processes (EP) and number of processes (NPROC).
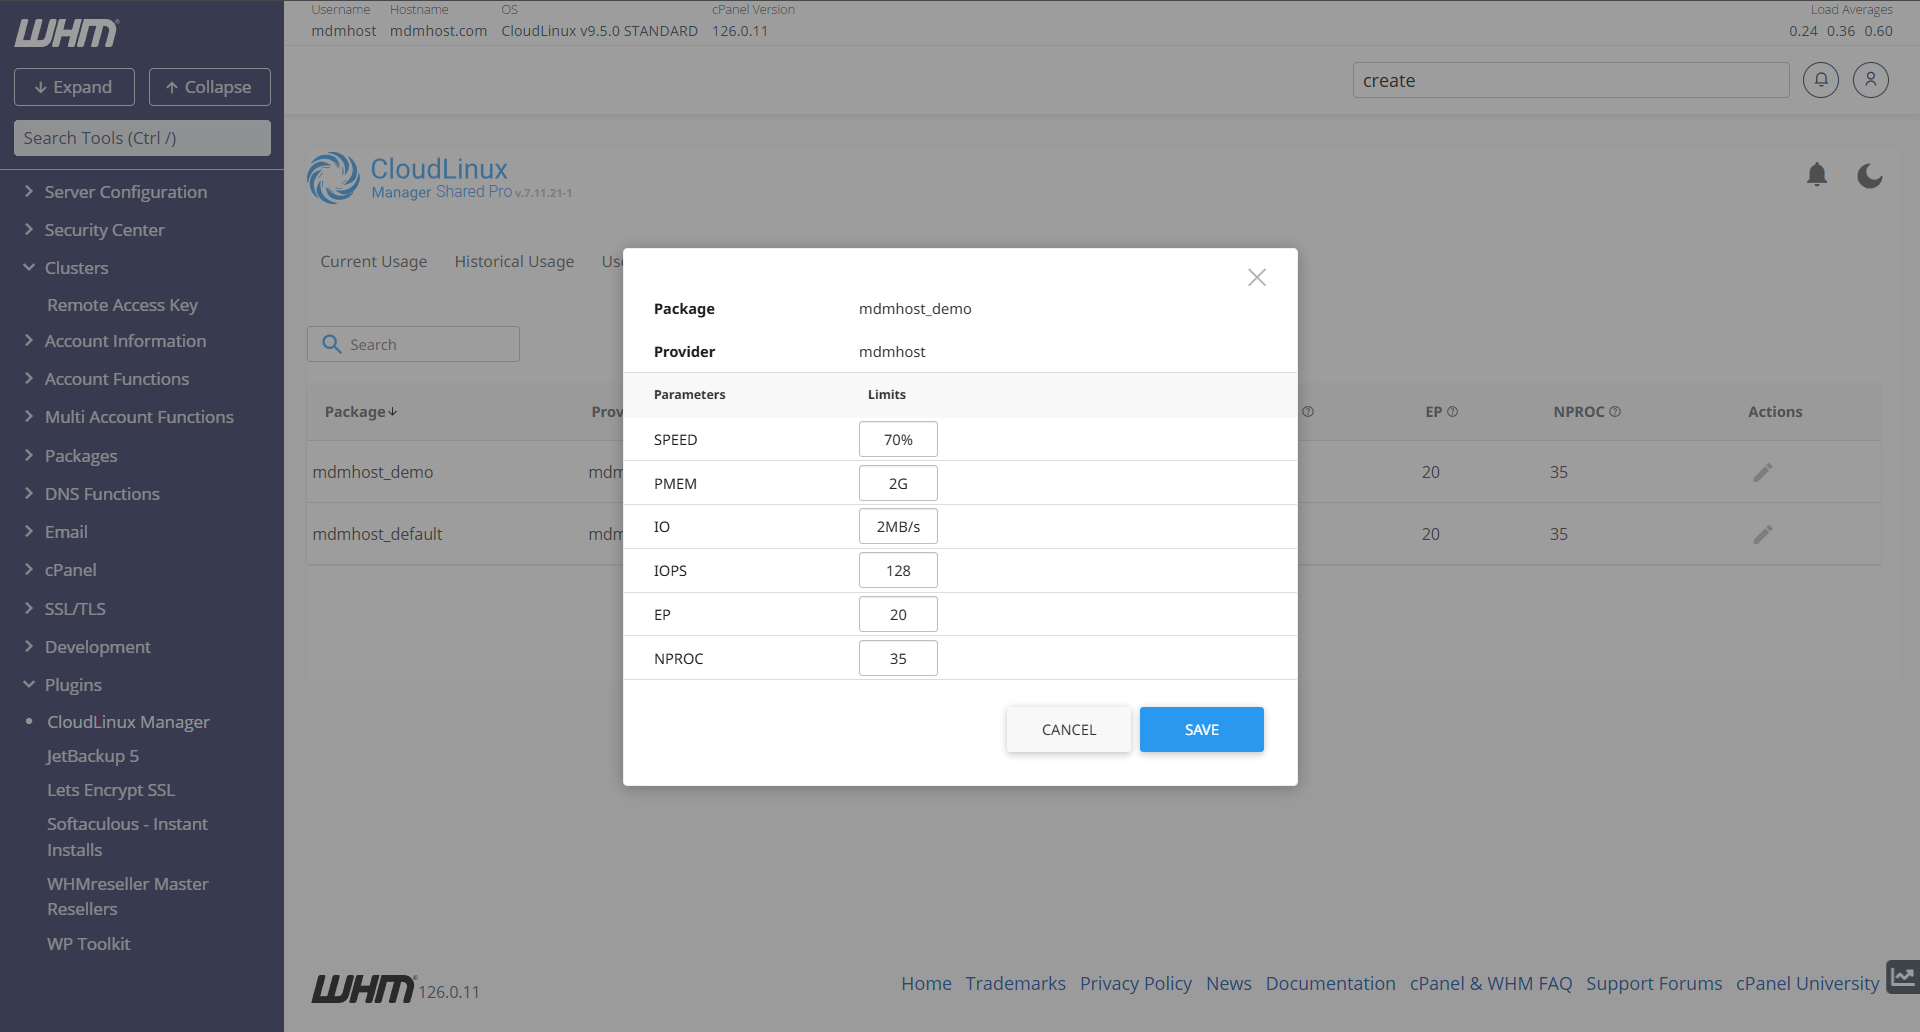
- Click Save.
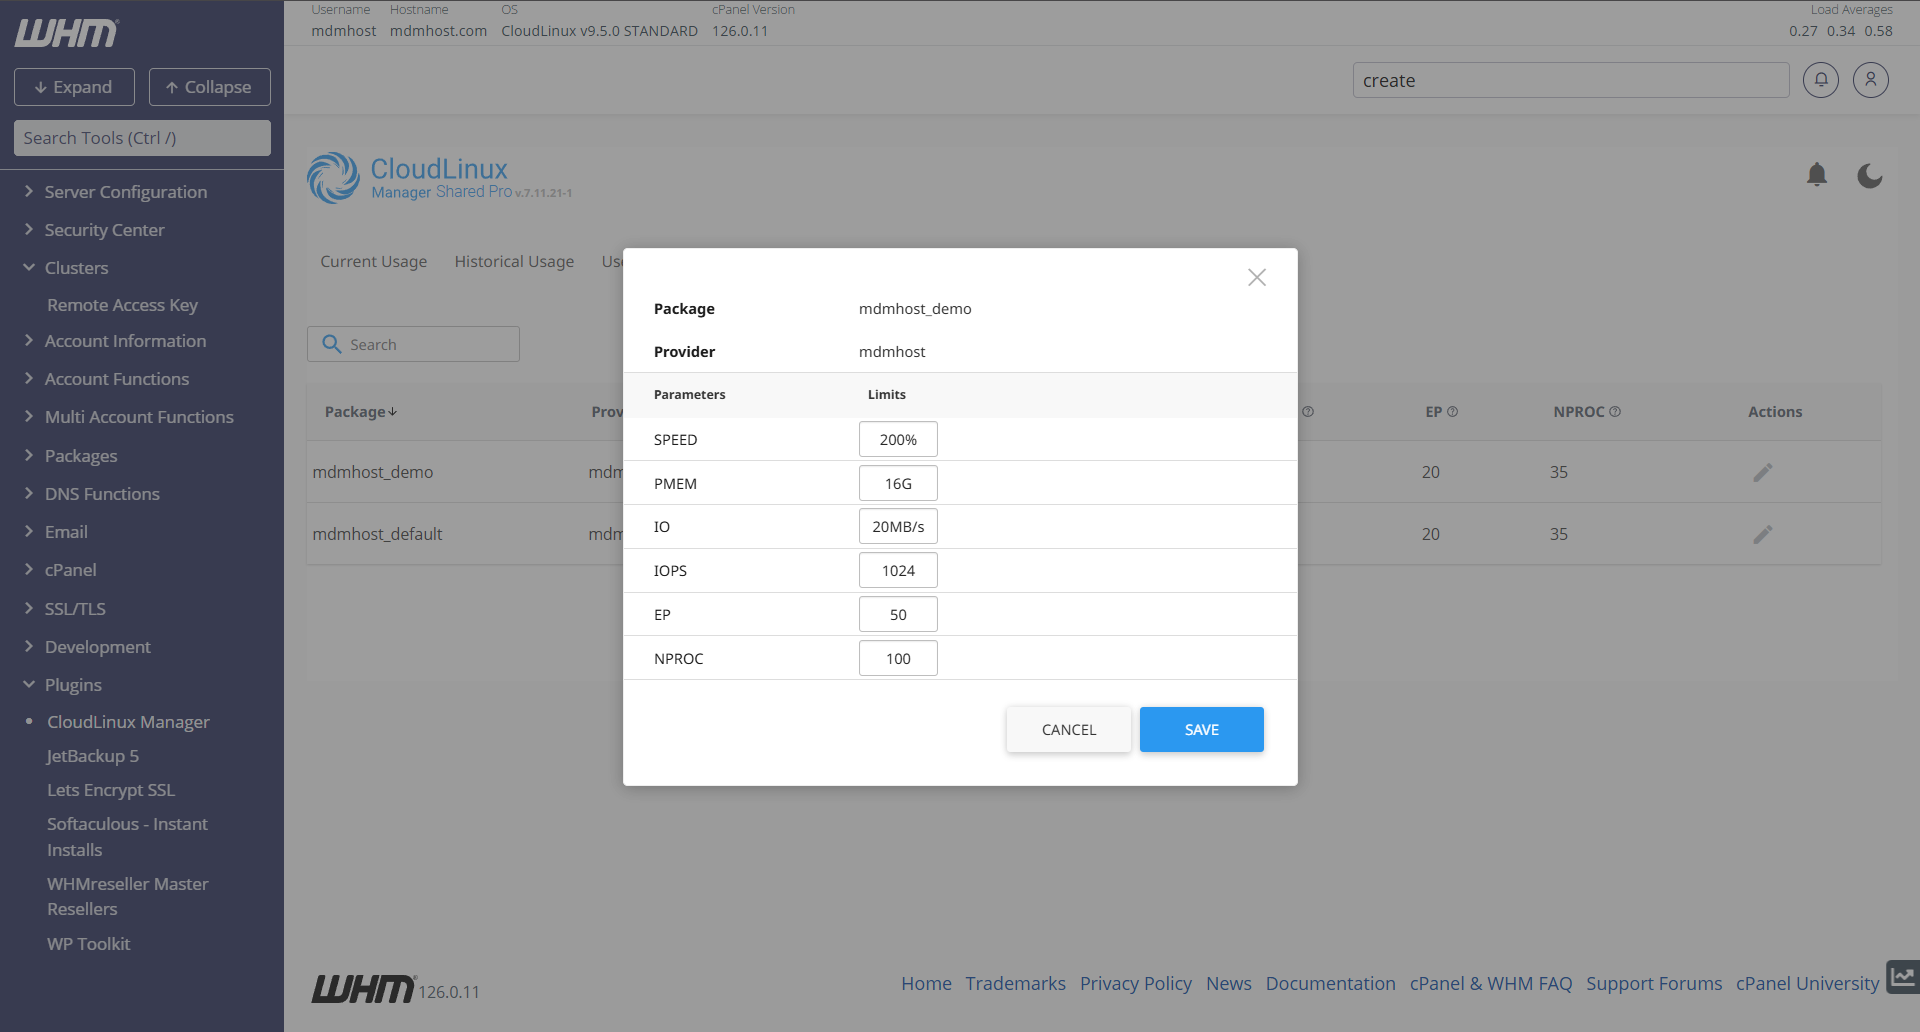
The package now shows the new values, and every account that uses it receives them right away.
Warning: Stay within your plan's maximum per package or account. If you enter more, CloudLinux Manager refuses the value or warns you.
Give one account different limits
Use this when a single customer needs more (or less) than the rest of the package.
- Open the Users tab.
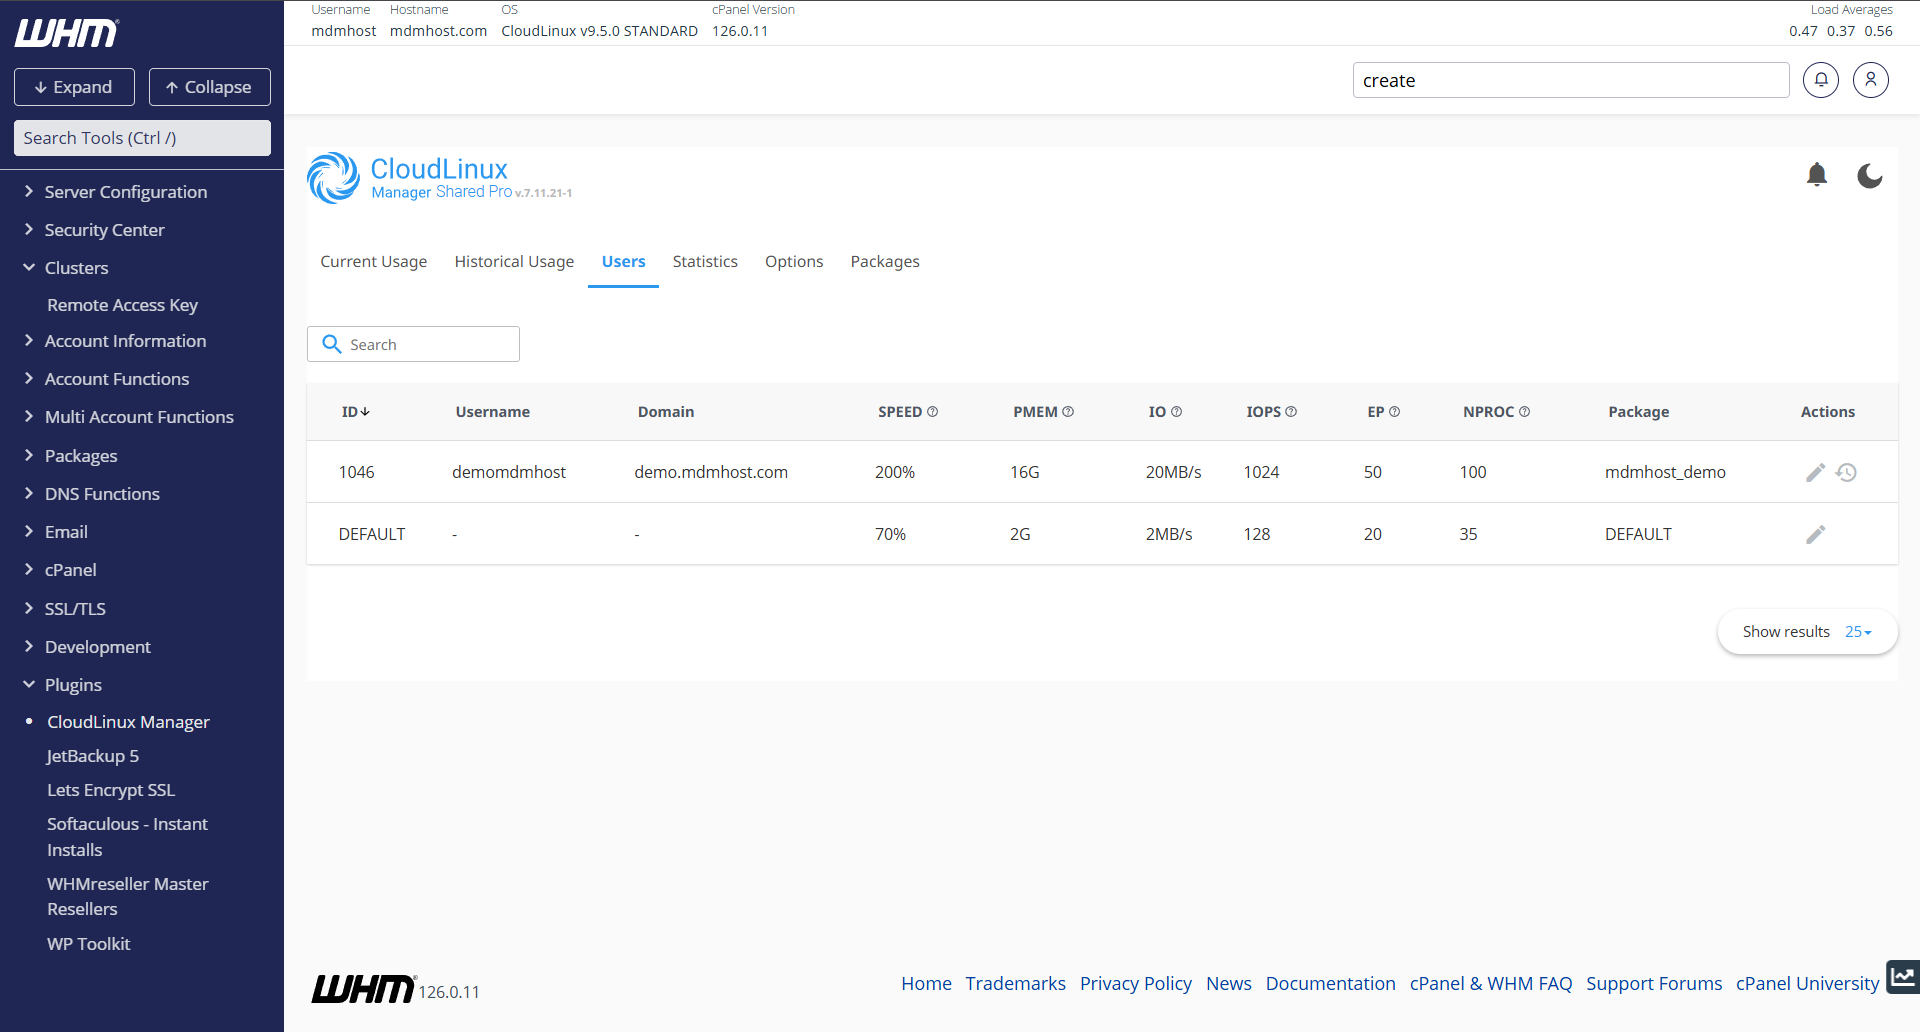
- Click the pencil icon next to the cPanel account.
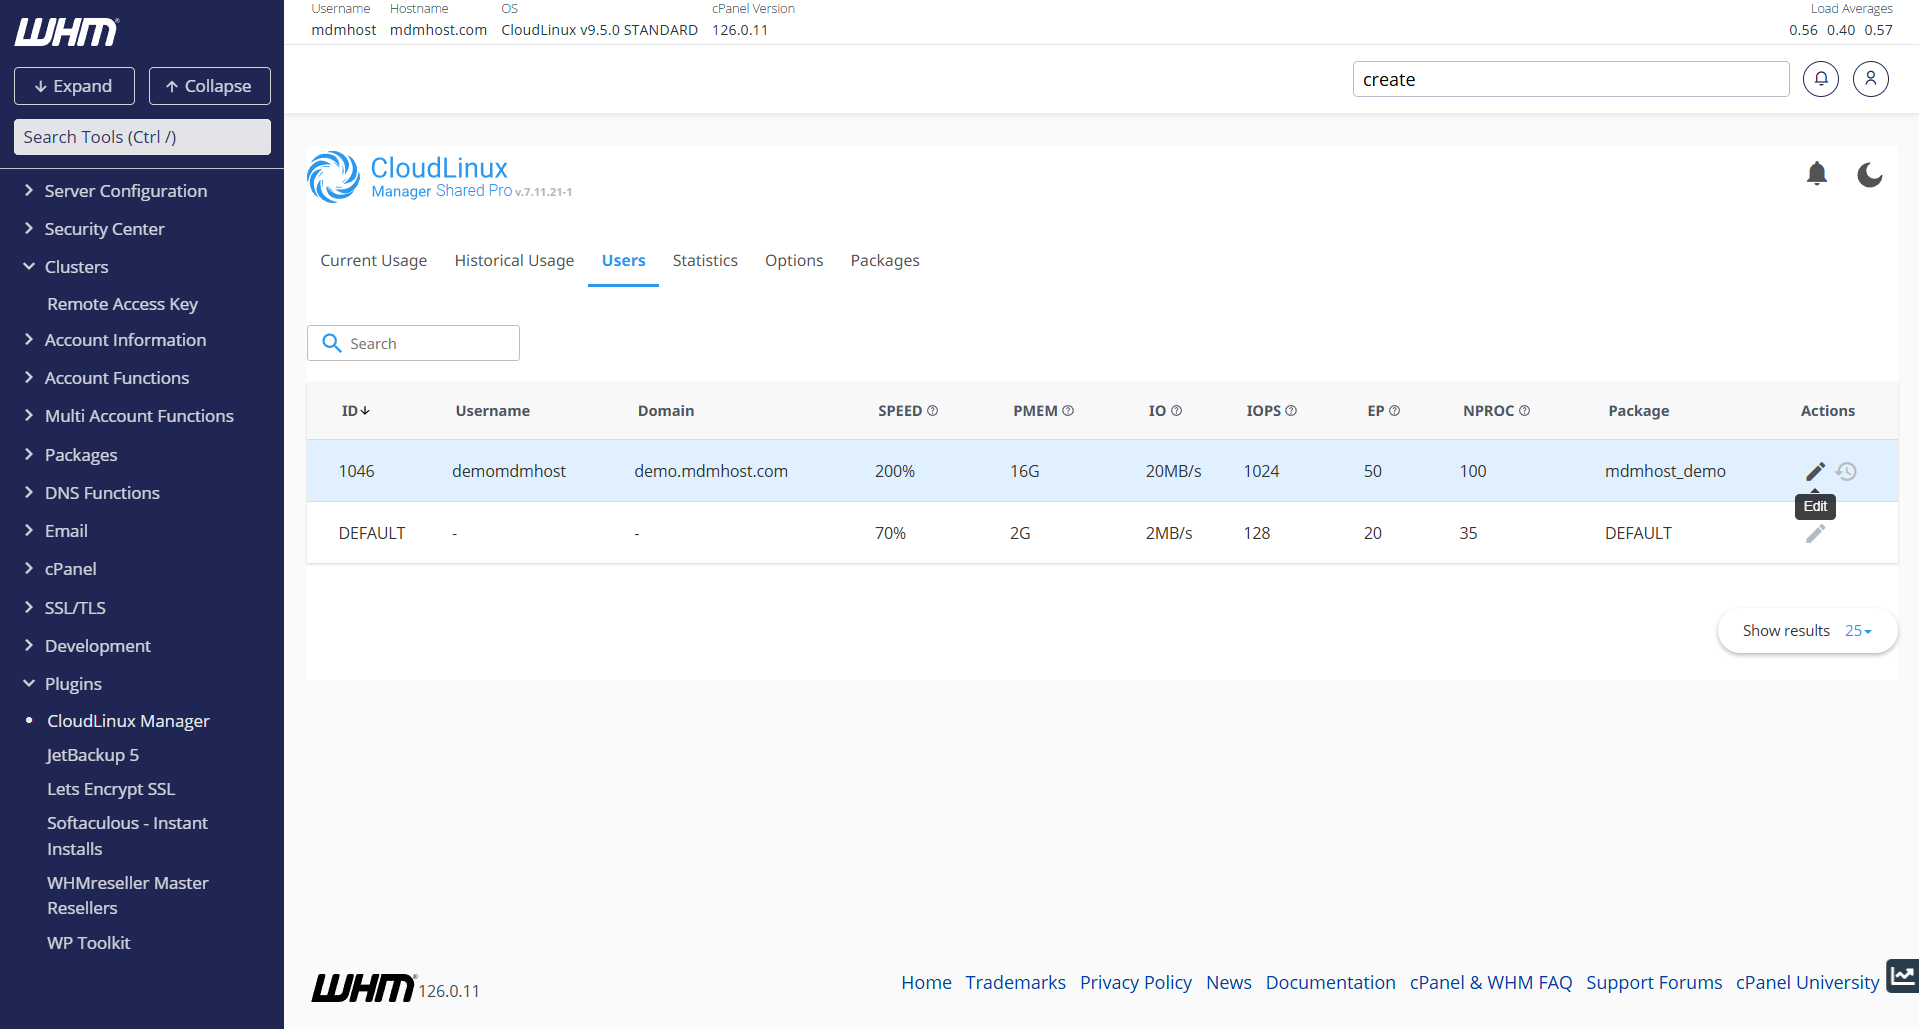
- Enter the account's own CPU, memory, I/O and process limits.
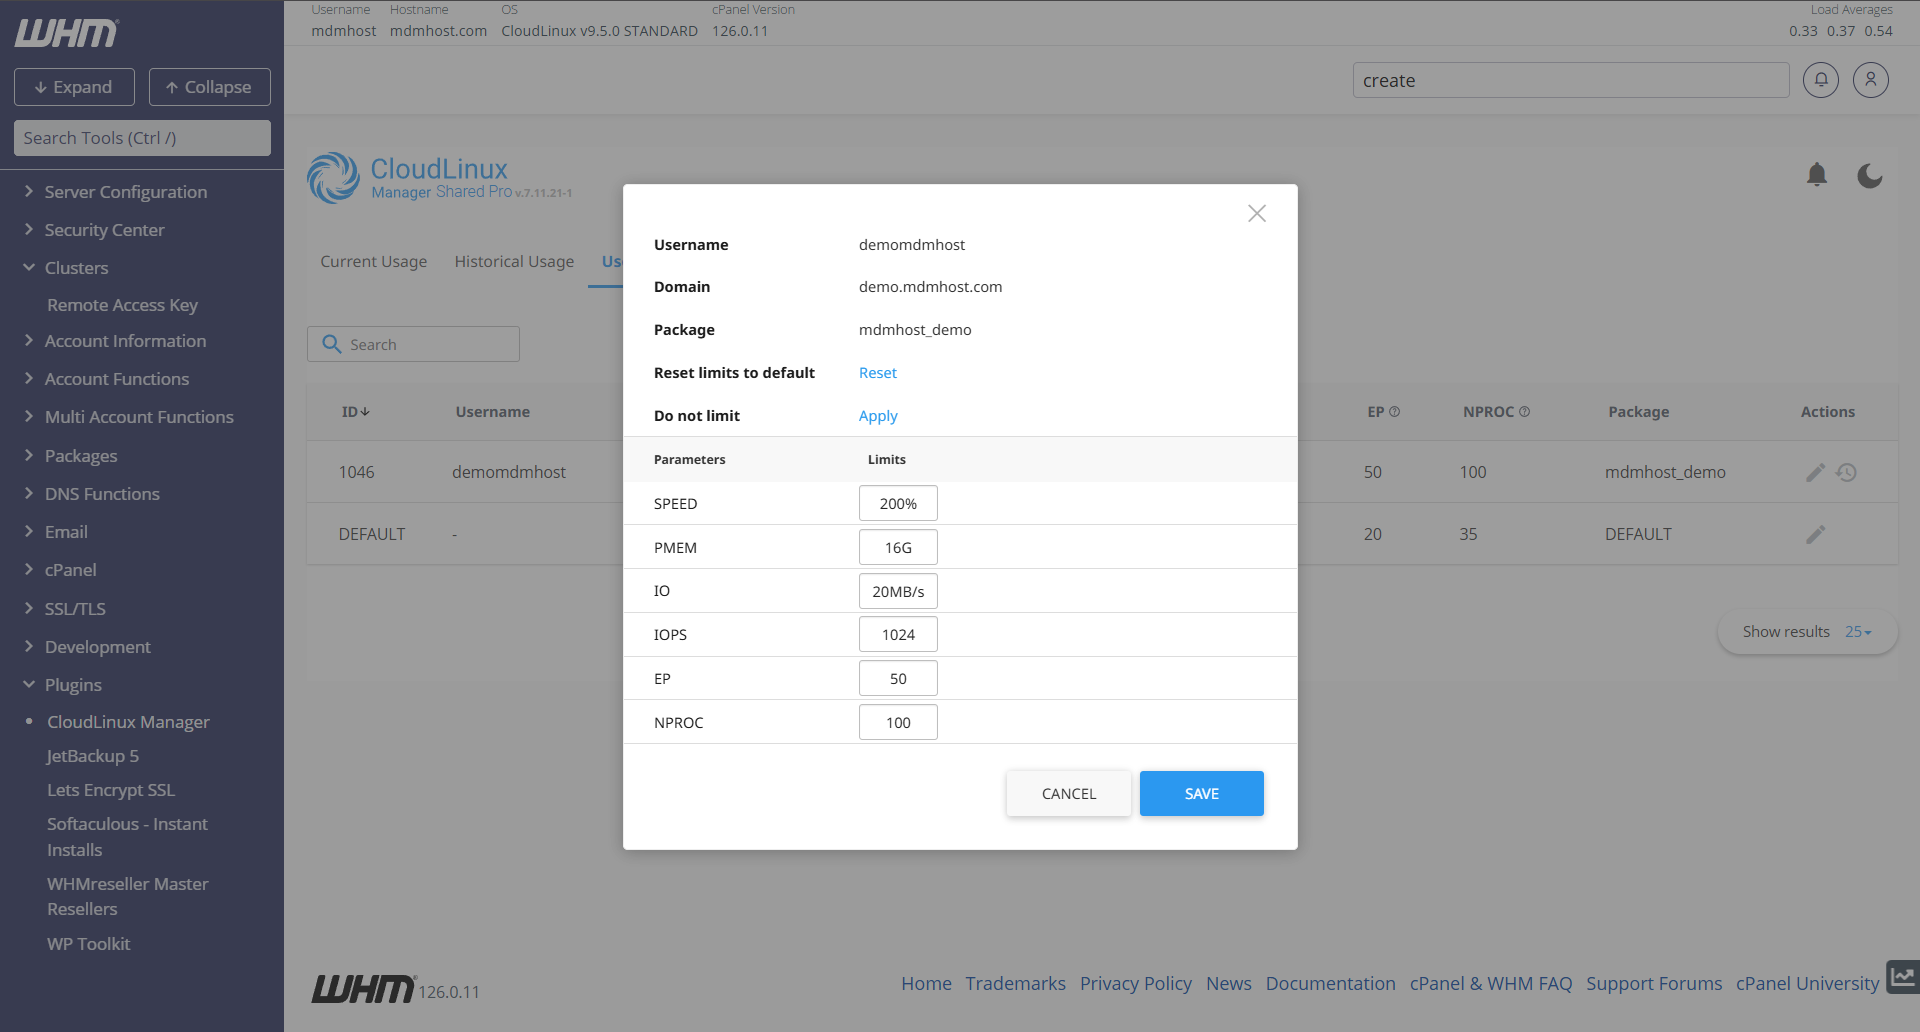
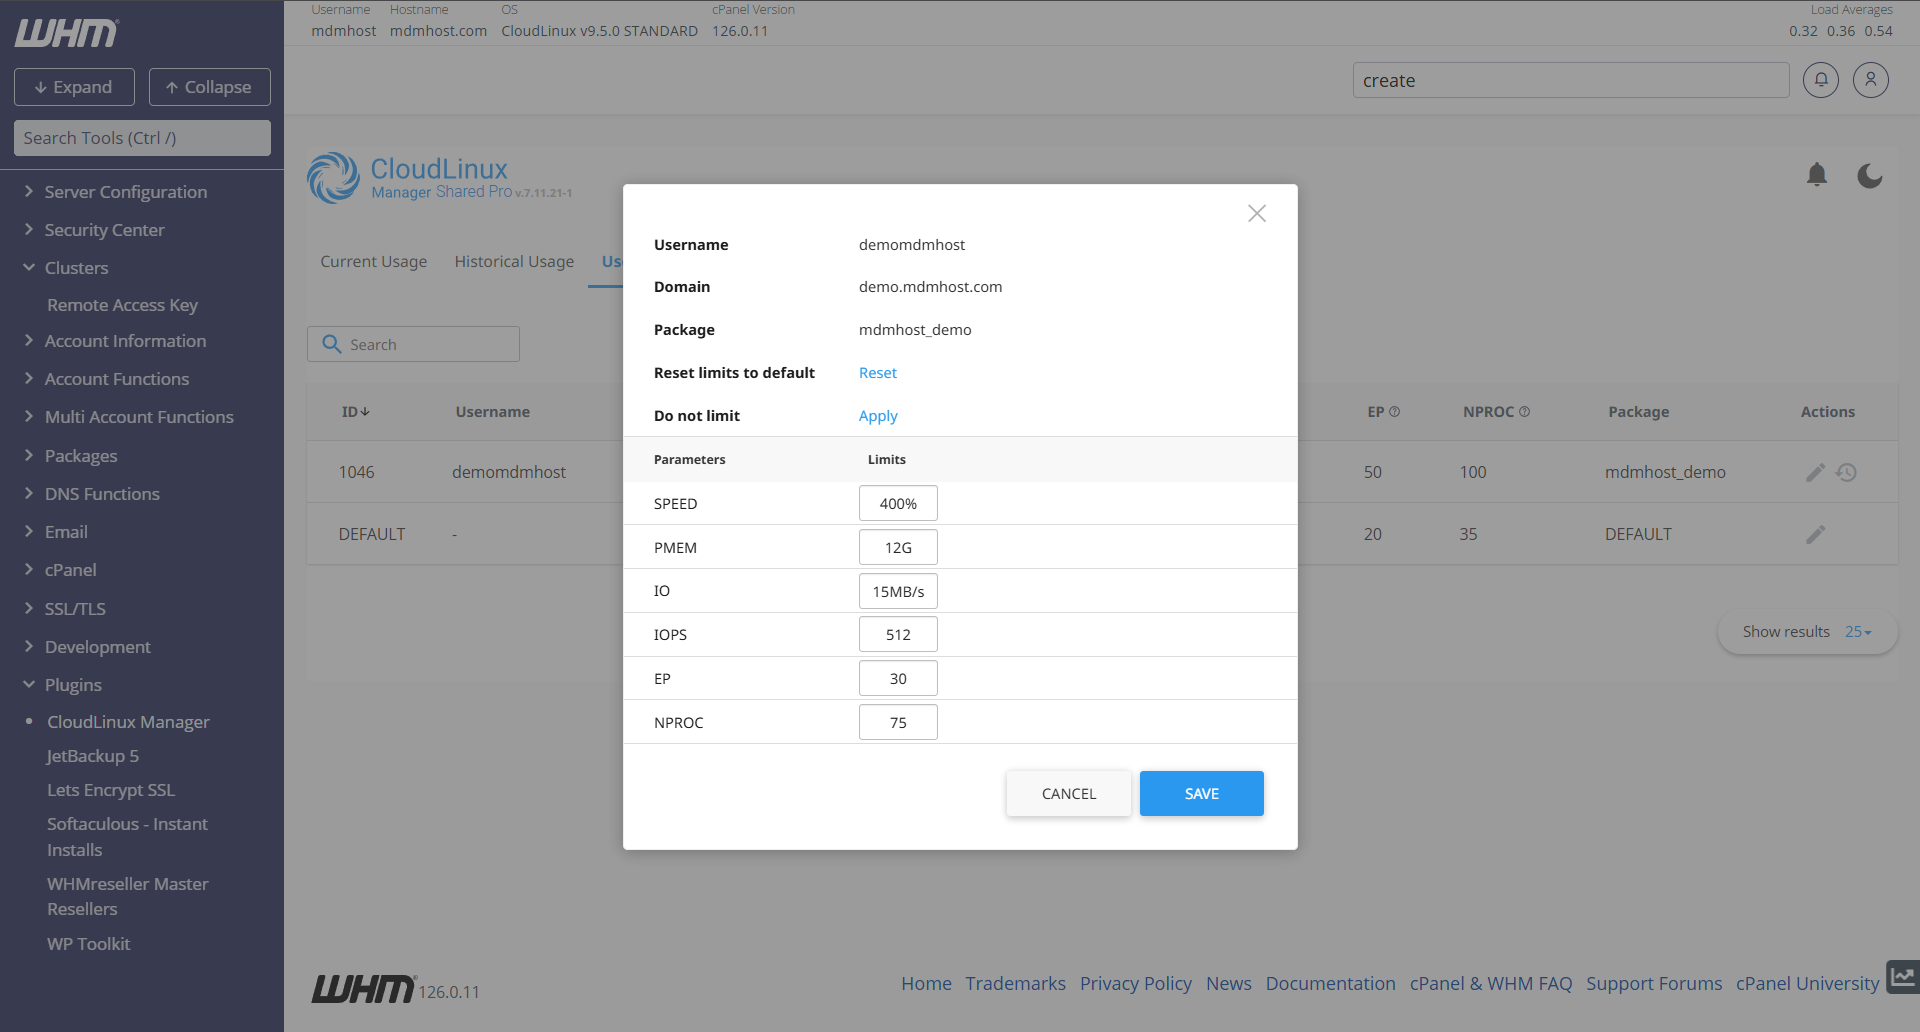
- Click Save. The new limits apply immediately.
Why an account shows in red
An account turns red in the Users list when its limits differ from its package. For example: your plan allows up to 16 GB of memory per account, the package is set to 8 GB, and you raise one account to 16 GB. That account is now highlighted.

Note: The red row is only a reminder that the account differs from its package. It does not cause errors or slow the account down.
Next steps
- See the maximum limits for every plan in CloudLinux resource limits for resellers.
- Deciding between plans? Read Reseller vs Master Reseller hosting.
- Need a hand? Open a ticket or chat with us, 24/7.